Apple always brings something new, innovative, and fun to use features with its camera in its latest iPhone models and the iPhone 13 is no exception. The New Apple iPhone 13 features a 3x telephoto camera, a wide-angle camera, and an ultra-wide camera with a much bigger aperture. Which now has a minimum focal distance of only 2 centimeters.
And its advanced camera features make it more formidable, it comes loaded with features such as photographic styles, cinematic mode, and many more. Without further ado, let’s move to the tip we have brought you.
In this article, we will tell you how you can use Portrait mode on your Apple iPhone 13.
Join Tip3x on Telegram
What is Portrait mode? Portrait mode is a camera feature that allows your camera to capture pictures or videos where the background is blurred and the subject stands out clearly. It creates a depth-of-field effect and then lets you capture photos with a sharp focus on the subject and a blurred background.

Before moving to the tip let us tell you about how its works. The Portrait mode is a shooting mode available on your iPhone’s camera app. That allows you to apply a depth-of-field effect to help you keep your subject -people, pets, objects, and more, sharp while creating a beautifully blurred background. and also allows you to apply and adjust different lighting effects to your Portrait mode photos.
How to use Portrait mode:
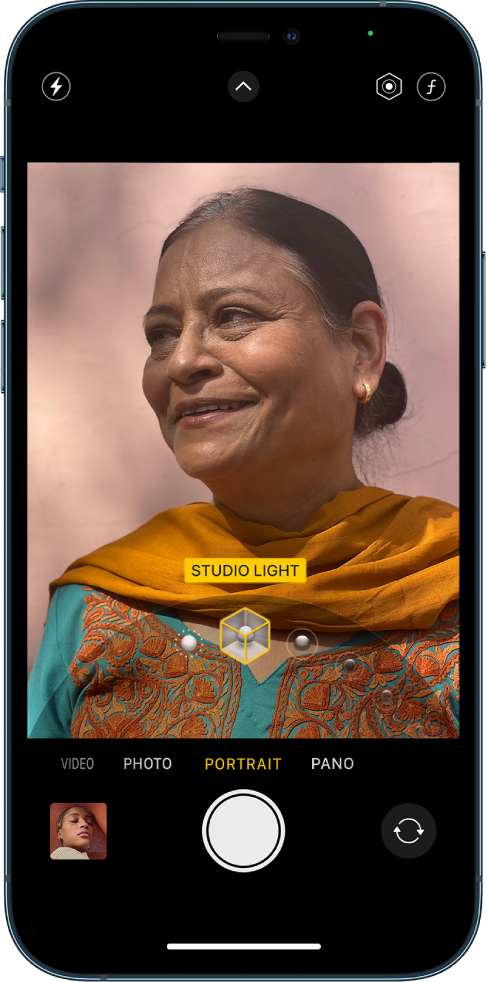
Step 1: On your iPhone 13 open the Camera app and swipe to Portrait mode.

Step 2: Then follow the tips onscreen to frame your subject in the yellow portrait box.
Step 3: Then drag the Portrait Lighting control to choose a lighting effect:
-
-
- Natural Light: The face is in sharp focus against a blurred background.
- Studio Light: The face is brightly lit, and the photo has an overall clean look.
- Contour Light: The face has dramatic shadows with highlights and lowlights.
- Stage Light: The face is spotlit against a deep black background.
- Stage Light Mono: The effect is similar to Stage Light, but the photo is in classic black and white.
- High-Key Light Mono: Creates a grayscale subject on a white background.
-
Step 4: After selecting a light effect, tap the Shutter button.


